Arduino - pulse an LED with a cosine wave function
Posted on January 21, 2017 by Paul
In this short article, I will show you how to pulse an LED with Arduino using a cosine function. You can see the final result in the next short video:
List of components that you will need to do the above experiment:
- 1 Arduino Uno;
- 1 Breadboard;
- 1 LED (I’ve used a green LED);
- 1 resistor (I’ve used a 220 Ω resistor). Please note that if you don’t use a resistor you will burn the LED!
- 3 jump wires.
If you don’t have an Arduino, there is a link for a complete kit (Arduino and components) at the end of this article.
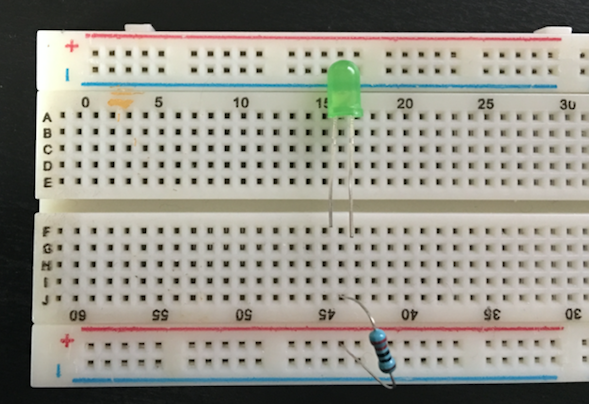
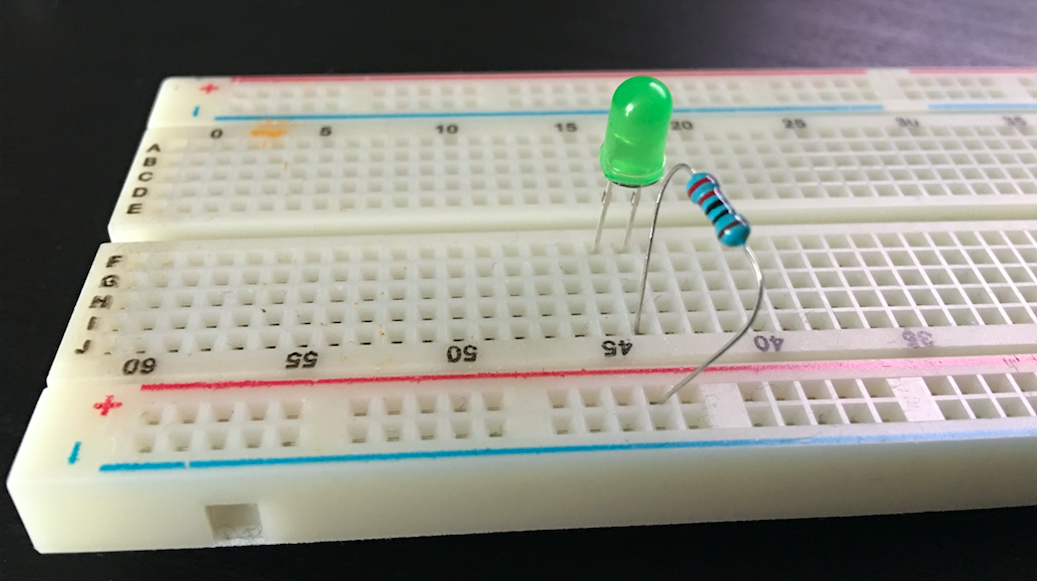
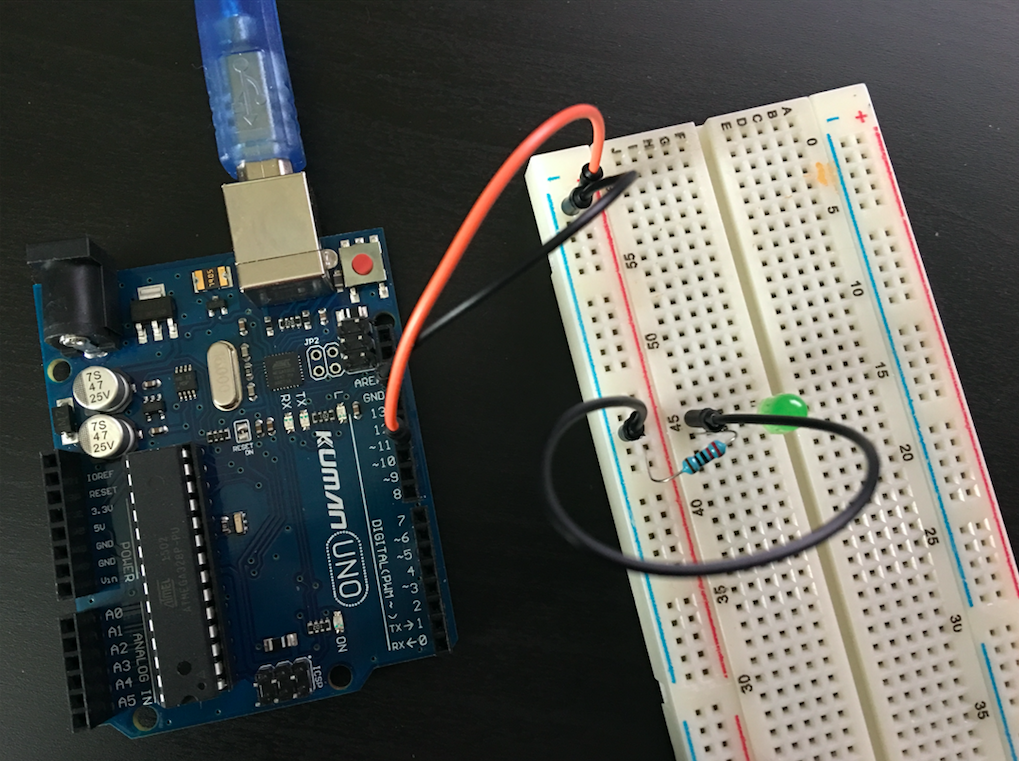
Start by putting the resistor on the breadboard, the LED anode (positive wire, this is usually the longer wire) will be placed on the same row as the resistor.
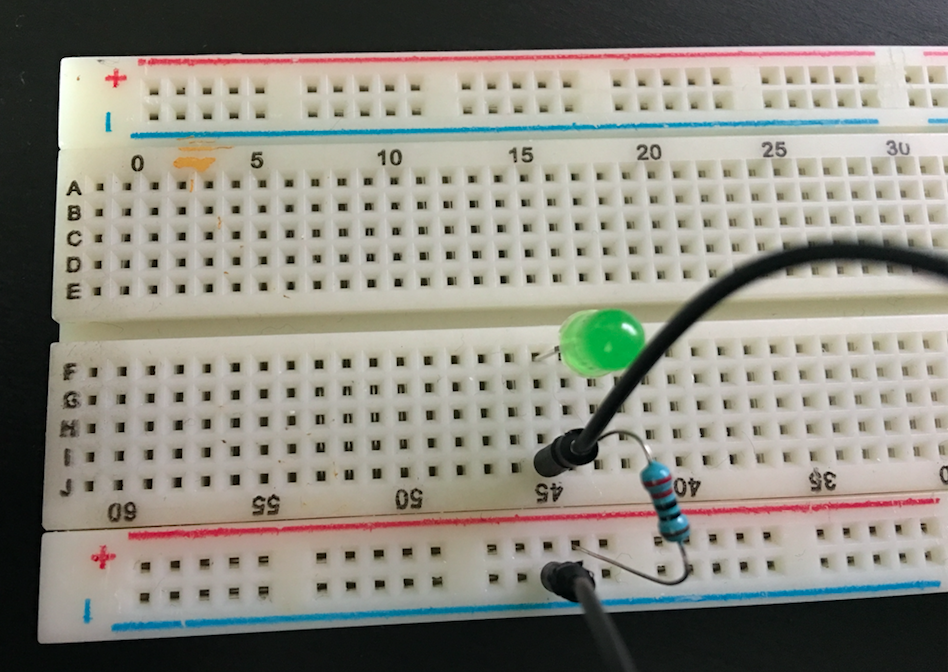
Next, use a jump wire to connect the row on which the cathode of the LED is connected to the breadboard ground:
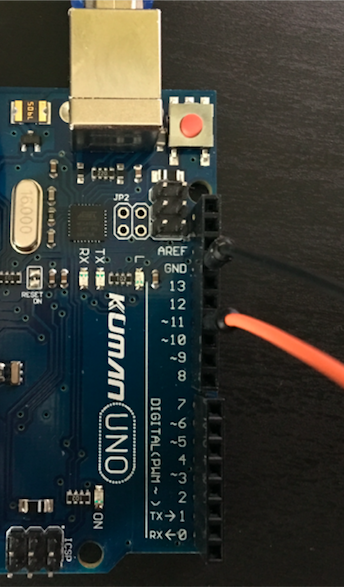
Now, in order to complete the circuit, we need to connect the Arduino to the breadboard. Arduino Uno supports the analogWrite function on pins 3, 5, 6, 9, 10 and 11. Connect a jump wire to one of the above pins. For this article I’ve used pin 11. Also connect a jump wire to the ground pin:
Finally, connect pin 11 from the Arduino to the breadboard positive bus and the ground from the Arduino to the breadboard ground bus:
If you connect your Arduino to a power source, nothing will happen because no signal is sent through pin 11 at this point. We need to program the Arduino to send a cosine wave signal to pin 11.
The analogWrite function that we’ll use, accepts values between 0 (always off) and 255 (always on). In order to make the LED continuously pulse from off to on and back, we want to send a cosine like signal to pin 11.
The cosine function takes values in the -1, +1 interval, while we need values from 0 to 255. This means that we need to scale and translate the cosine function to get values in the desired range. It is simpler to understand the transform from [-1, +1] to [0, 255] from the next three graphics.
The cosine function has values on the [-1, +1] interval:
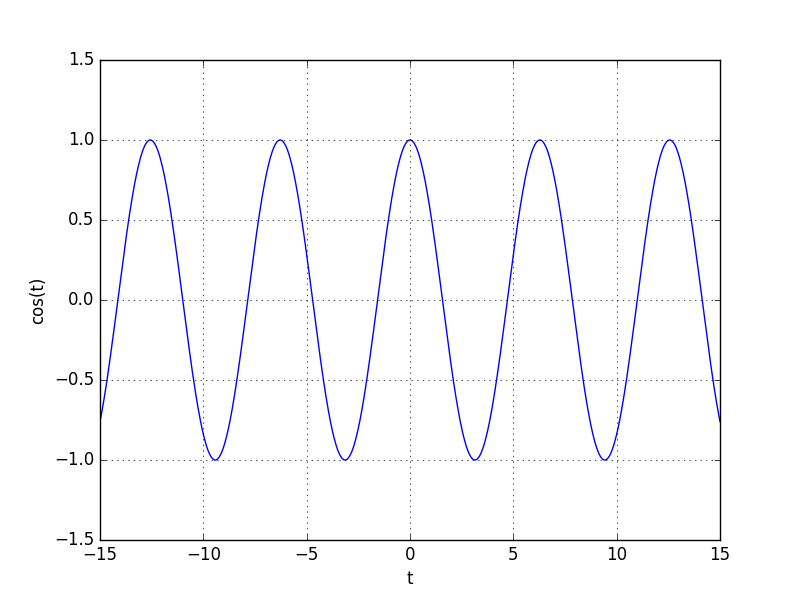
If we multiply the cosine function by 0.5 and add 0.5, we will have values on the [0, 1] interval. Multiplying again with 255 will move the values on the [0, 255] interval:
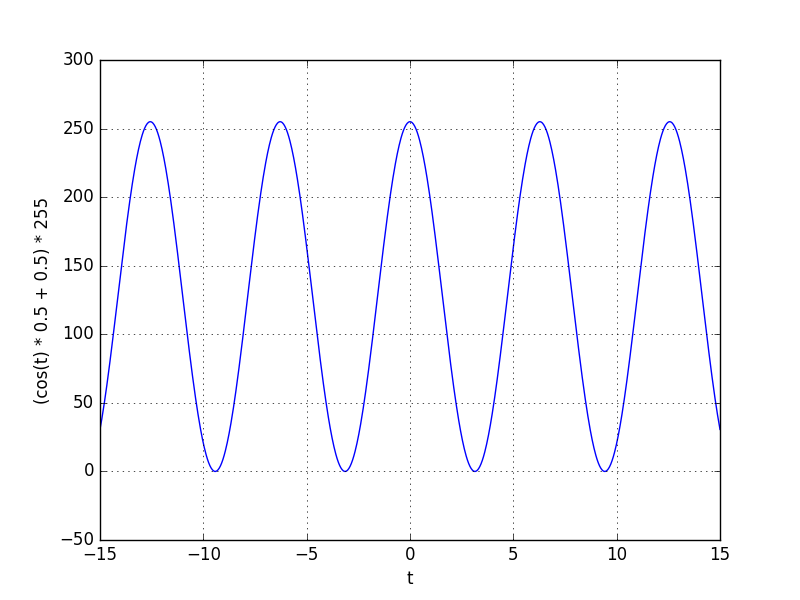
Please note that the above function is 255 for t = 0. If we use it as it is, we’ll start with the LED on and we prefer to start from 0 (off value). This can be achieved if we subtract π from t:
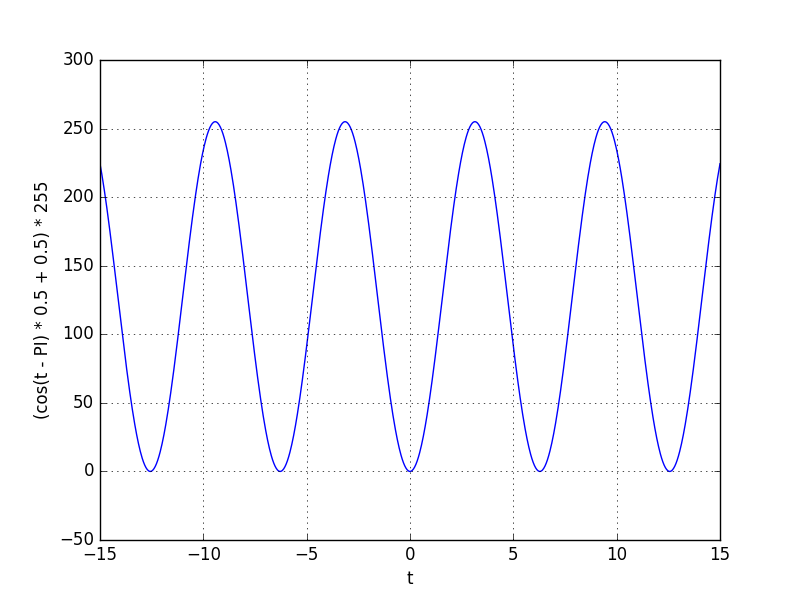
A simple implementation of the above function is presented in the next Arduino program:
 1 const int green_led_pin = 11;
 2
 3 void setup() {
 4 }
 5
 6 void cosine_pulse(int pin, float time_step, int pause) {
 7   for(float t = 0; t < 2*PI; t += time_step) {
 8     float value = (cos(t - PI)*0.5+0.5)*255;
 9     analogWrite(pin, value);
10     delay(pause);
11   }
12 }
13
14 void loop() {
15   cosine_pulse(green_led_pin, 0.0025, 1);
16 }
If you need to buy a cheap Arduino kit, this is a good option. Keep in mind that this is a cheap Arduino clone and not the original. Personally, I found that it has decent hardware quality for the price, however the included documentation is not great, but you can use the official Arduino documentation without a problem.
If money is not a problem, you can buy the official Arduino Starter Kit. This has the official, high quality documentation included, however it has less components than the previous kit and the price is more than double.
If you want to learn more about Arduino, I would recommend Exploring Arduino by Jeremy Blum: