Arduino buzzer player with adjustable volume - playing a part of Für Elise by Ludwing van Beethoven
Posted on January 31, 2017 by Paul
The code for this post is on GitHub: https://github.com/sol-prog/Arduino_music.
In this article, I will show you how to play music with the Arduino, using a passive piezo buzzer. You can see the final result in the next video:
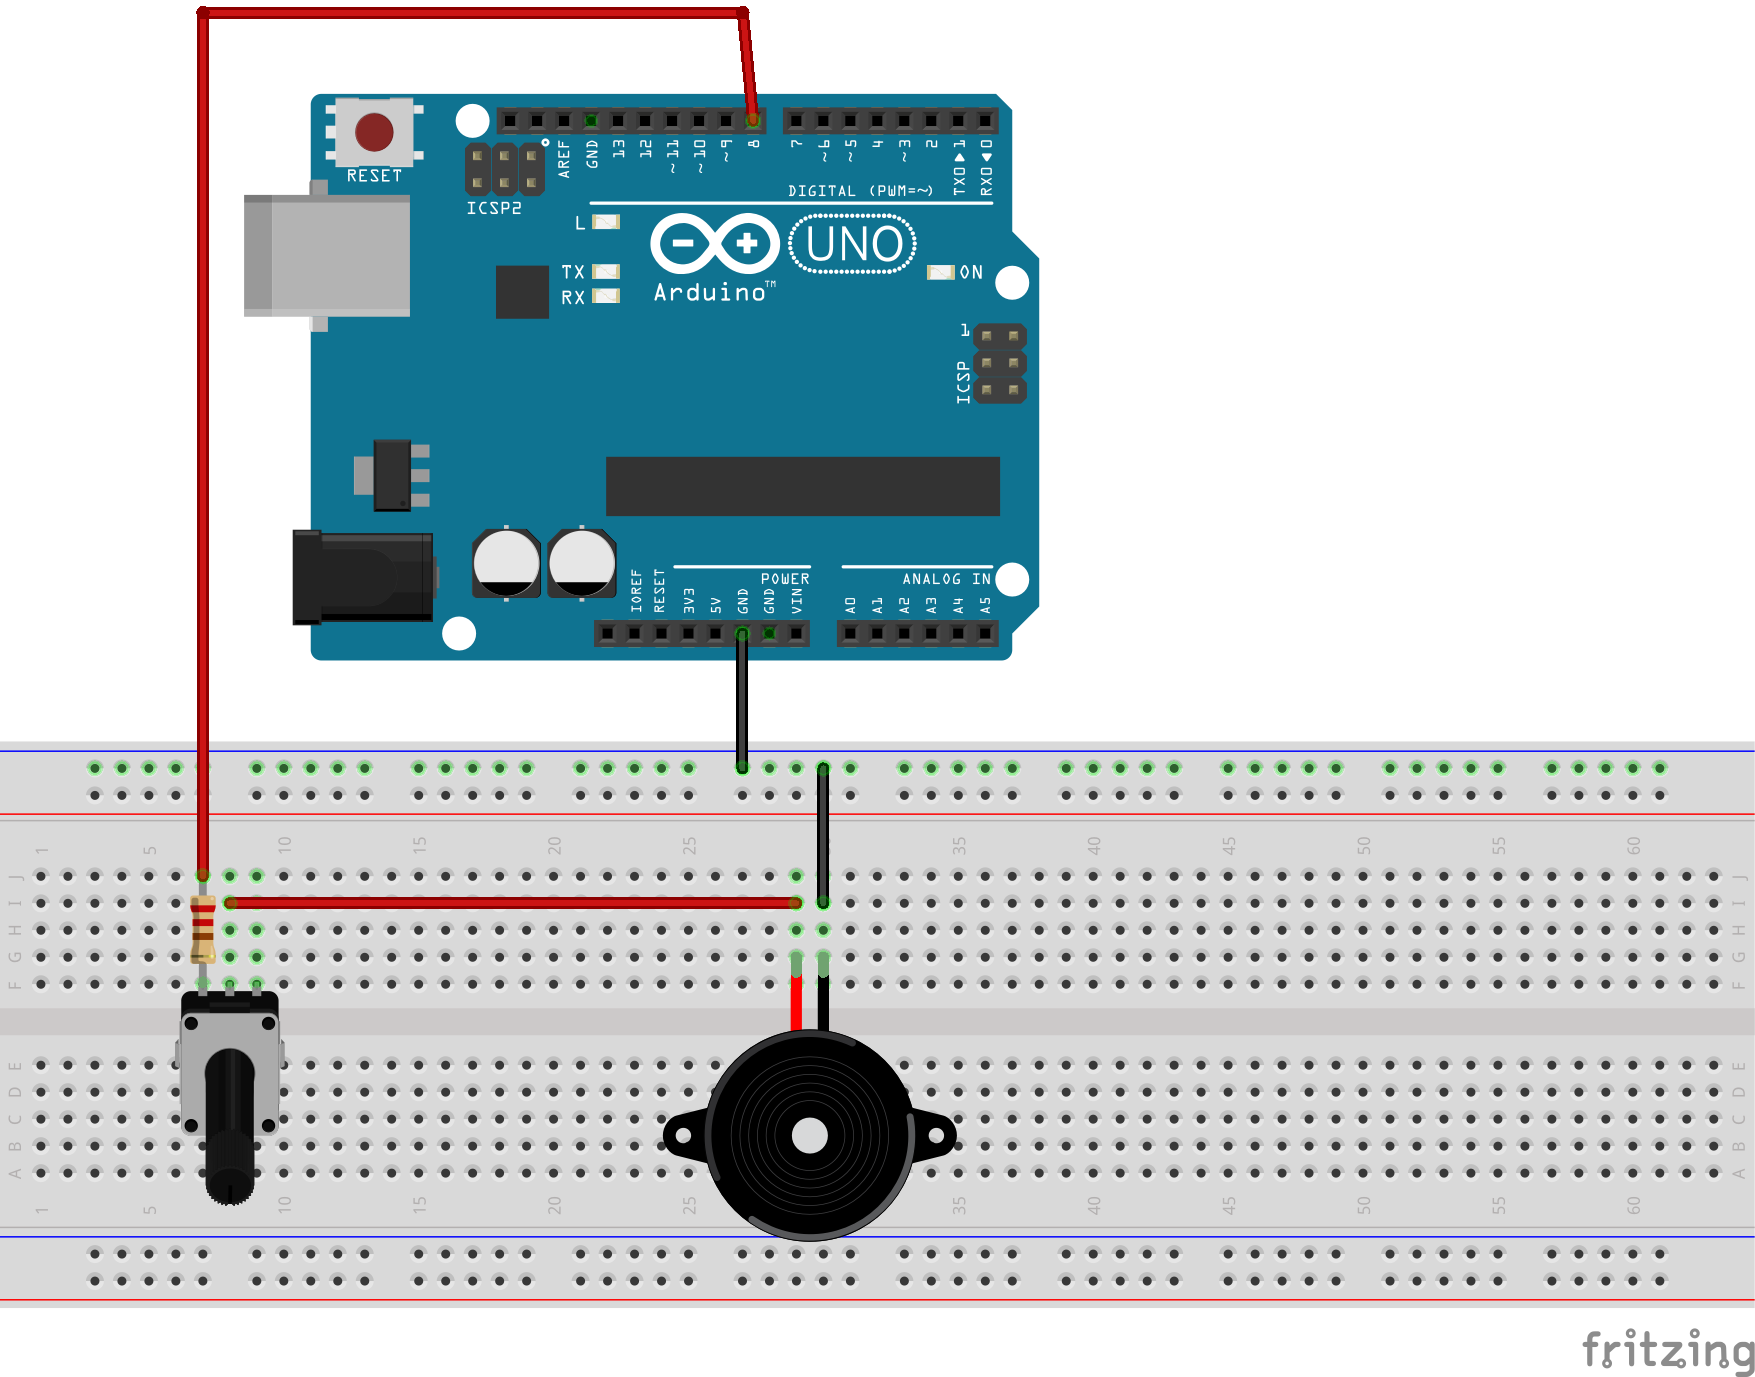
These are the components that you will need to repeat the above experiment:
- 1 Arduino Uno;
- 1 Breadobard;
- 1 passive buzzer;
- jump wires;
- 1 220 Ω resistor;
- 1 10 kΩ potentiometer.
Last two components from the above list are optional, but recommended. You can hook up the buzzer directly to an Arduino digital pin, but I find it to be annoyingly loud for high pitches. Using the suggested potentiometer, wired in series with the buzzer, you can adjust the volume by increasing the resistance of the circuit.
In the next diagram, made with Fritzing, you can see a more clear picture of how the circuit was wired:
In order to play a note we will use the tone() function. tone() can generate a square wave of a specified frequency (31 - 65535 Hz for Arduino Uno) and an optional duration in milliseconds:
1 tone(pin, frequency, duration)For example, the next instruction will generate a wave with a frequency of 200 Hz and a duration of 250 ms on pin 8:
1 tone(8, 200, 250);If you want to play simple songs on the Arduino, you will need to translate a music sheet to a list of frequencies and durations. We can use a helper file that defines musical notes as C macro constants, e.g.:
1 // ...
2 #define NOTE_C4  262
3 #define NOTE_CS4 277
4 #define NOTE_D4  294
5 #define NOTE_DS4 311
6 #define NOTE_E4  330
7 #define NOTE_F4  349
8 #define NOTE_FS4 370
9 // ...
The advantage of using the above macro definitions is low memory footprint and more memory available for the actual song. A typical musical piece will use only a part of the available notes, so it will be a waste of memory to define the notes as a C array. This could be important for the Uno that has only 2048 bytes available for SRAM.
For this article, I’ve partially translated Für Elise by Ludwig van Beethoven to pitches and durations. In a typical musical piece there are usually many parts that are repeated after a while, these parts can be stored in multiple arrays, e.g:
1 int play1[] = {NOTE_E5, NOTE_DS5, NOTE_E5, NOTE_DS5, NOTE_E5, NOTE_B4, NOTE_D5, NOTE_C5, NOTE_A4, PAUSE, NOTE_C4, NOTE_E4, NOTE_A4, NOTE_B4, PAUSE, NOTE_E4};
2 int play1_time[] = {SN, SN, SN, SN, SN, SN, SN, SN, EN, SN, SN, SN, SN, EN, SN, SN};
3
4 int play2[] = {NOTE_GS4, NOTE_B4, NOTE_C5, PAUSE, NOTE_E4};
5 int play2_time[] = {SN, SN, EN, SN, SN};
The advantage of using multiple arrays like in the above example is that later we can repeat the piece without using extra memory, e.g.:
1   play_piece(8, play1, play1_time, sizeof(play1)/sizeof(play1[0]));
2   play_piece(8, play2, play2_time, sizeof(play2)/sizeof(play2[0]));
3   play_piece(8, play1, play1_time, sizeof(play1)/sizeof(play1[0]));
4   play_piece(8, play3, play3B_time, sizeof(play3)/sizeof(play3[0]));
where the play_piece function can be implemented as:
1 void play_piece(int pin, int *melody, int *duration, int length) {
2   for (int i = 0; i < length; ++i) {
3     tone(pin, melody[i], duration[i]);
4     delay(duration[i]);
5   }
6 }
You can find the complete Arduino project on the article GitHub repository.
Disclaimer, I don’t have formal musical training, if the reader sees or hears any discrepancies between the buzzer performance and the original Beethoven, please send corrections to the article GitHub repository.
If you want to learn more about computer generating music, I would recommend Making Music with Computers: Creative Programming with Python:

If you want to learn more about Arduino, I would recommend Exploring Arduino by Jeremy Blum: