Python OpenCV - show an image in a Tkinter window
Posted on April 20, 2018 by Paul
This is a short tutorial about using Tkinter, the default Python GUI library, with OpenCV. On Windows, Tkinter is bundled with the official Python installer. On Linux, you can install Tkinter using your distribution package manager. The situation is a bit more complex on macOS, that comes with Python 2.7 and an old version of Tkinter, at the time of this writing, the easiest path is to install Miniconda Python 3 that comes with the latest Tkinter.
OpenCV includes some rudimentary GUI capabilities, useful if you need to show a video or an image, get the mouse or the keyboard input. But, if you need something more complicated like buttons, drop down lists, menus, labels, text boxes and so on, you need to use a dedicated GUI library like Qt or Tkinter.
In the remaining of this article, I’ll assume that you have Python 3.6, Tkinter 8.6 and OpenCV 3.3 or newer installed on your machine. If you need help to install the above on Windows, macOS or Linux check my previous articles.
If you are on a Debian derived system, like Ubuntu, you can install Tkinter with:
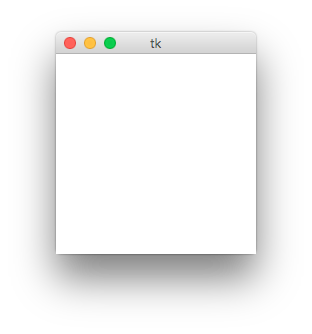
1 sudo apt install python3-tkHere is how you can create a window with Python 3 and Tkinter:
1 import tkinter
2
3 # Create a window
4 window = tkinter.Tk()
5
6 # Run the window loop
7 window.mainloop()
This is what you can see on a macOS machine if you run the above code:
Next, let’s add an image to our window. In Tkinter you can add an image to various widgets, e.g. you can add an image to a Label or a Button, you can put an image on a Canvas or you can use an image as the background of a Frame. For our purposes, the Tkinter Canvas widget is a good fit since it lets you add multiple overlapping images, draw shapes, write text and so on.
Tkinter stores and displays images using the PhotoImage class. As a side note, the PhotoImage class can read GIF, PPM and PGM images directly from your disk, e.g:
1 photo = tkinter.PhotoImage(file="background.gif")If you need to read or convert other image formats to a PhotoImage object, you can use the Pillow image library. This is how you can install Pillow on most operating systems:
1 pip install PillowOn some cases (e.g. on Debian, Ubuntu, Raspbian), you will need to use pip3 instead of pip for the above install line.
As a side note, Pillow is a Python 3 reimplementation of the old Python Imaging Library.
Please note, that you could use Pillow to read most common image formats directly, but since this article is about using OpenCV with Tkinter, we are going to use OpenCV to read or write images to the disk. We’ll use Pillow to convert an image loaded by OpenCV to a PhotoImage object. Technically, the OpenCV bindings for Python store an image in a NumPy array.
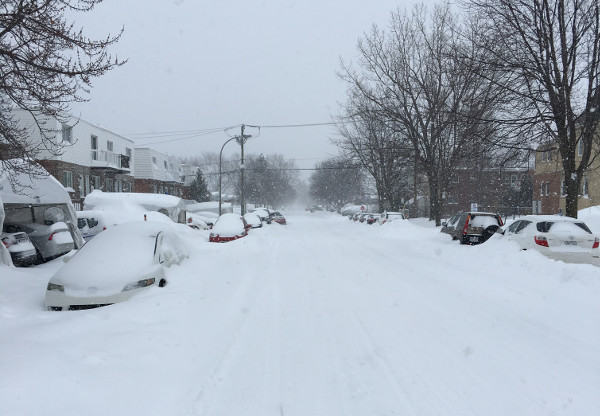
Let’s start by loading the next image using OpenCV:
 1 import tkinter
 2 import cv2
 3 import PIL.Image, PIL.ImageTk
 4
 5 # Create a window
 6 window = tkinter.Tk()
 7
 8 # Load an image using OpenCV
 9 cv_img = cv2.imread("background.jpg")
10
11 # Get the image dimensions (OpenCV stores image data as NumPy ndarray)
12 height, width, no_channels = cv_img.shape
13
14 # Run the window loop
15 window.mainloop()
Now, that we have the image dimensions, let’s add a Tkinter Canvas element that can show the entire image:
 1 # ...
 2
 3 # Get the image dimensions (OpenCV stores image data as NumPy ndarray)
 4 height, width, no_channels = cv_img.shape
 5
 6 # Create a canvas that can fit the above image
 7 canvas = tkinter.Canvas(window, width = width, height = height)
 8 canvas.pack()
 9
10 # ...
Let’s use Pillow to convert the NumPy array that stores the loaded image to a PhotoImage and add this to the Canvas:
 1 # ...
 2
 3 canvas.pack()
 4
 5 # Use PIL (Pillow) to convert the NumPy ndarray to a PhotoImage
 6 photo = PIL.ImageTk.PhotoImage(image = PIL.Image.fromarray(cv_img))
 7
 8 # Add a PhotoImage to the Canvas
 9 canvas.create_image(0, 0, image=photo, anchor=tkinter.NW)
10
11 # Run the window loop
12 window.mainloop()
If you run the code, you should see something like this:
If the image looks off, it is because by default OpenCV will store a color image in the BGR or BGRA color space, while a Tkinter PhotoImage assumes the image is stored as RGB.
We can convert the image to RGB on the line that loads the image:
1 # ...
2
3 # Load an image using OpenCV
4 cv_img = cv2.cvtColor(cv2.imread("background.jpg"), cv2.COLOR_BGR2RGB)
5
6 # ...
Here is the complete code that shows an image using OpenCV and Tkinter:
1 import tkinter
2 import cv2
3 import PIL.Image, PIL.ImageTk
4
5 # Create a window
6 window = tkinter.Tk()
7 window.title("OpenCV and Tkinter")
8
9 # Load an image using OpenCV
10 cv_img = cv2.cvtColor(cv2.imread("background.jpg"), cv2.COLOR_BGR2RGB)
11
12 # Get the image dimensions (OpenCV stores image data as NumPy ndarray)
13 height, width, no_channels = cv_img.shape
14
15 # Create a canvas that can fit the above image
16 canvas = tkinter.Canvas(window, width = width, height = height)
17 canvas.pack()
18
19 # Use PIL (Pillow) to convert the NumPy ndarray to a PhotoImage
20 photo = PIL.ImageTk.PhotoImage(image = PIL.Image.fromarray(cv_img))
21
22 # Add a PhotoImage to the Canvas
23 canvas.create_image(0, 0, image=photo, anchor=tkinter.NW)
24
25 # Run the window loop
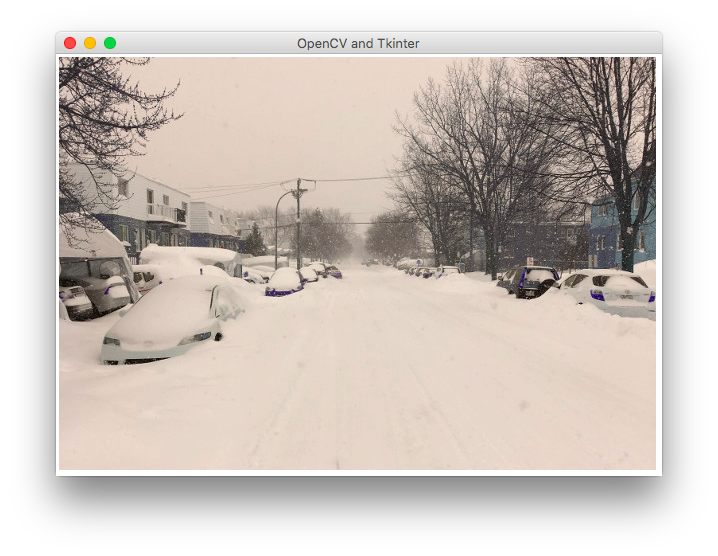
26 window.mainloop()If you run the code, you should see something like this:
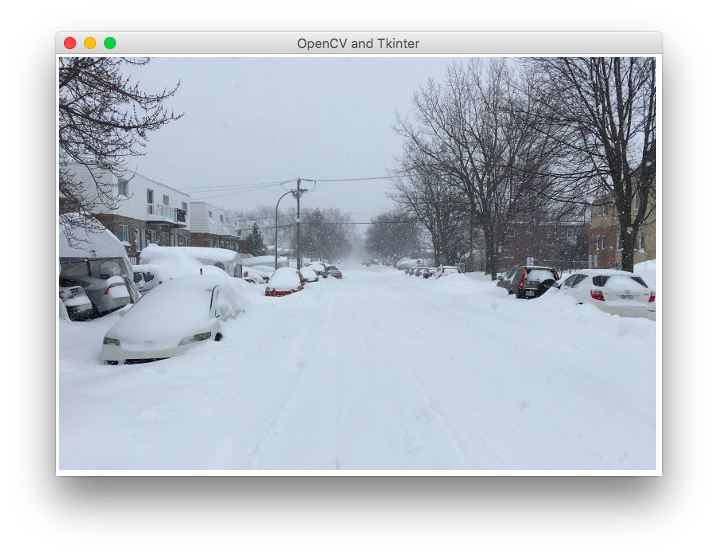
now, the image looks right.
Let’s add a button that, when pressed, will let us blur the image from the above example:
1 import tkinter
2 import cv2
3 import PIL.Image, PIL.ImageTk
4
5 # Callback for the "Blur" button
6 def blur_image():
7 print("blurred")
8
9 # Create a window
10 window = tkinter.Tk()
11
12 # ...
13
14 # Add a PhotoImage to the Canvas
15 canvas.create_image(0, 0, image=photo, anchor=tkinter.NW)
16
17 # Button that lets the user blur the image
18 btn_blur=tkinter.Button(window, text="Blur", width=50, command=blur_image)
19 btn_blur.pack(anchor=tkinter.CENTER, expand=True)
20
21 # Run the window loop
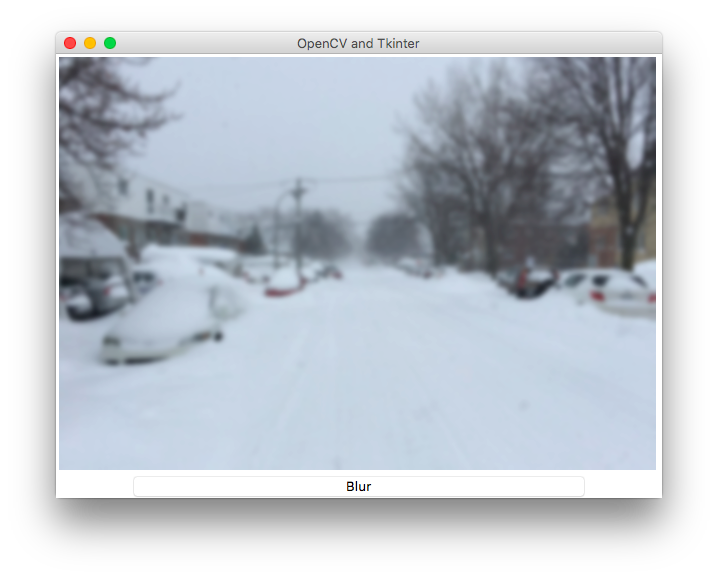
22 window.mainloop()Please note in the above snippet the addition of a callback function that is triggered when the user presses the button. If you run the modified code, this is what you should see:

At this point, if you press the “Blur” button it will simply print blurred on the Terminal.
If we want to be able to blur the loaded image and show the blur effect we need a way to reference cv_img and photo in the blur_image function. An ugly, but effective, solution is to use the global keyword:
 1 import tkinter
 2 import cv2
 3 import PIL.Image, PIL.ImageTk
 4
 5 # Callback for the "Blur" button
 6 def blur_image():
 7     global photo
 8     global cv_img
 9
10     cv_img = cv2.blur(cv_img, (3, 3))
11     photo = PIL.ImageTk.PhotoImage(image = PIL.Image.fromarray(cv_img))
12     canvas.create_image(0, 0, image=photo, anchor=tkinter.NW)
13
14 # ...
If you run the modified code and press the “Blur” button a couple of times, you should see something like this:
For a short example, like the one from this article, you can use global variables and a straightforward, imperative programming style. However, in a slightly larger program you will want to keep the code a bit more organized with classes and avoid the use of global variables.
Let’s see how we can rewrite the above example in a more OOP way:
 1 import tkinter
 2 import cv2
 3 import PIL.Image, PIL.ImageTk
 4
 5 class App:
 6     def __init__(self, window, window_title, image_path="background.jpg"):
 7         self.window = window
 8         self.window.title(window_title)
 9
10         # Load an image using OpenCV
11         self.cv_img = cv2.cvtColor(cv2.imread(image_path), cv2.COLOR_BGR2RGB)
12
13         # Get the image dimensions (OpenCV stores image data as NumPy ndarray)
14         self.height, self.width, no_channels = self.cv_img.shape
15
16         # Create a canvas that can fit the above image
17         self.canvas = tkinter.Canvas(window, width = self.width, height = self.height)
18         self.canvas.pack()
19
20         # Use PIL (Pillow) to convert the NumPy ndarray to a PhotoImage
21         self.photo = PIL.ImageTk.PhotoImage(image = PIL.Image.fromarray(self.cv_img))
22
23         # Add a PhotoImage to the Canvas
24         self.canvas.create_image(0, 0, image=self.photo, anchor=tkinter.NW)
25
26         # Button that lets the user blur the image
27         self.btn_blur=tkinter.Button(window, text="Blur", width=50, command=self.blur_image)
28         self.btn_blur.pack(anchor=tkinter.CENTER, expand=True)
29
30         self.window.mainloop()
31
32     # Callback for the "Blur" button
33     def blur_image(self):
34         self.cv_img = cv2.blur(self.cv_img, (3, 3))
35         self.photo = PIL.ImageTk.PhotoImage(image = PIL.Image.fromarray(self.cv_img))
36         self.canvas.create_image(0, 0, image=self.photo, anchor=tkinter.NW)
37
38
39 # Create a window and pass it to the Application object
40 App(tkinter.Tk(), "Tkinter and OpenCV")
If you want, you can further enhance the above code, for example, you can add a new button that will let you load a different image, check Tkinter filedialog.askopenfilename. Another feature you can add, is to let the user save the blurred image.
If you want to learn more about OpenCV and Python I would recommend reading OpenCV with Python Blueprints by M. Beyeler:
or, for OpenCV C++, OpenCV By Example by P. Joshi: